 Studytipsgh Studytipsgh is to provide effective study strategies and tips to help students get more knowledge to better their Education.
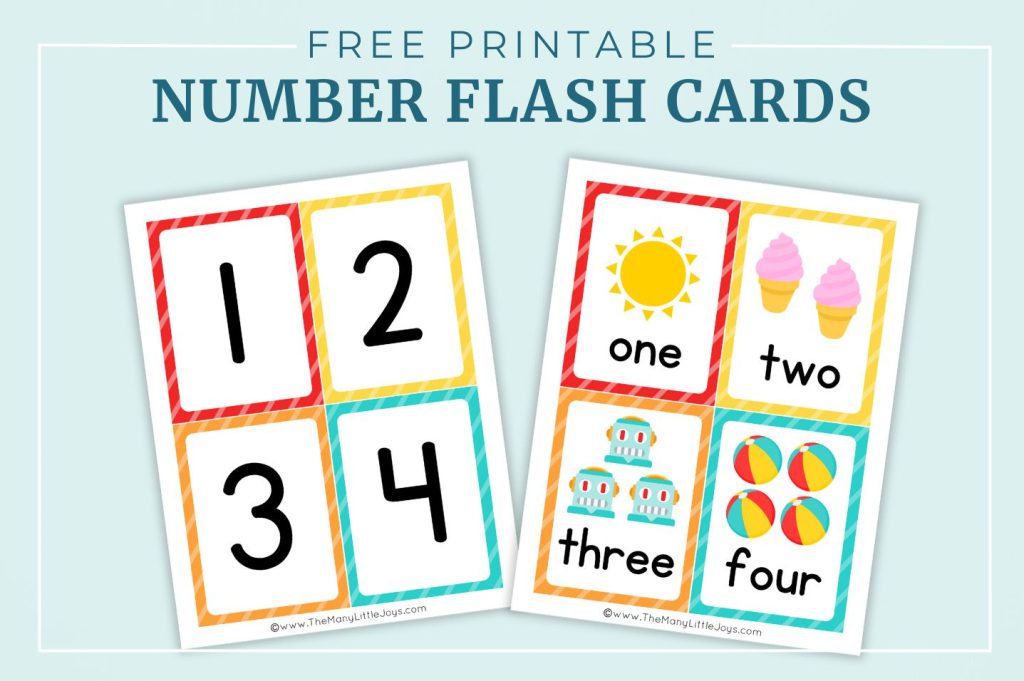
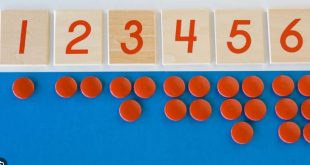
COUNTING – Flash Cards
Instructions for making – If paint is available, use one colour for the background and the other for the dots. If no paint is available and the card- board is a dingy colour, paste white paper over. If nothing else is available, lined paper from exercise books will suffice. When the paste is dry, draw and fill in the dots which should be reasonably large. Various arrangements of the same number of dots should be used-at least three of each number except one. In no case should the number of dots exceed six .
(i) Cardboard, 2 contrasting colours of paint or white paper, paste and ink.
(ii) Knife or scissors, paint-brush.
Plan

Quantity
At least one set of each-two, if sufficient cardboard is available.
Use
To give children practice in naming groups of objects. The cards can be used both for teaching and revision work. They can be used by the teacher or by pupils working in groups.
When to be used
When the children are forming mental images of groups and learning something of the range of numbers-probably about the latter half of the first term.
Materials required
2 Matching Designs
(i) Cardboard, 4 colours of tempera paint or 2 of ink. (ii) Ruler, pencil, scissors, pen.
Plan
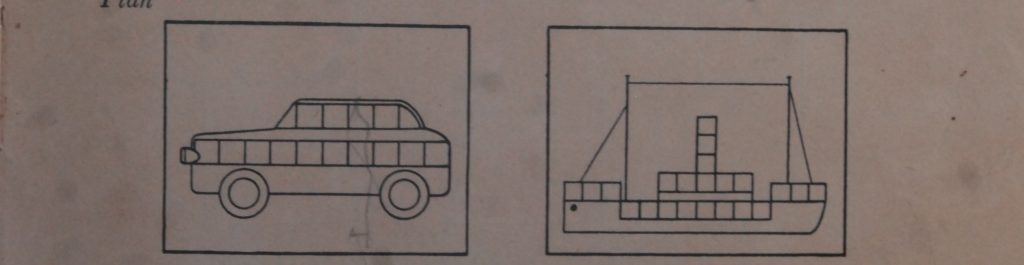
Other suitable pictures: house, railway engine, canoe (or local fishing craft), lorry.
Instructions for making
The picture is drawn on cardboard and the squares marked off as shown. Each group of squares is painted a different colour. Separate cardboard squares are then cut out to match those in the pictures in size and colour.
Quantity
At least four of each. Children place the loose cardboard squares on the correspond- ing ones in the picture. Each group of these is counted and checked from the picture and the number either written or said aloud.
When to be used
When children are building up early number concepts in the latter half of the first term in the first year. They may also be used for revision at later periods.
Matchboxes and Counters
Materials required
(i) 6 matchboxes, scrap cardboard, ink. (ii) Scissors, pen.
Plan
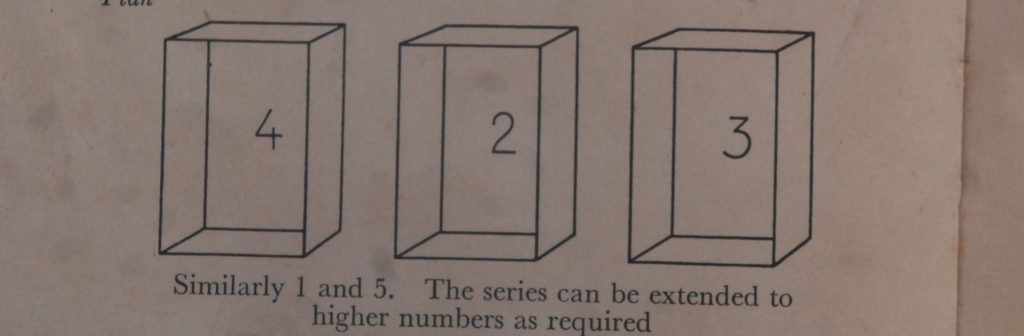
Instructions for making
Using the tray part of the matchbox, print figures on the inside of the bottom as shown. Cut out counters and keep them in another matchbox.
Quantity
Two sets for each class. Children place the required number of counters in each box. When to be used
When children are relating the written numbers to groups.
Self-Correcting Matching Boards
Materials required
(i) Cardboard or thin wood, paint or white paper and ink, paste.
(ii) Scissors, knife or razor-blade if using cardboard; saw if using wood. Pen or paint-brush.
Plan
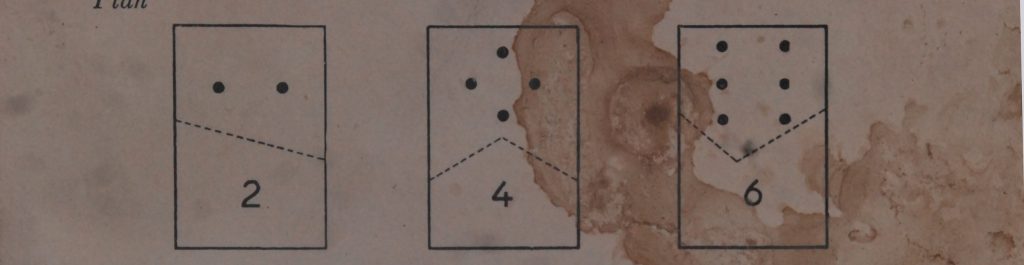
Instructions for making
The cards or pieces of wood are cut as shown. If no paint is available, then white paper can be pasted on the cards or boards. On the top section dots or squares are painted or printed, and on the bottom section the corresponding figure. The cards are then cut along the dotted lines. Various types of cuts can be used, the important thing being that no two are alike. Numbers up to 20 can be dealt with in this way.
Quantity
At least one set for the first-year class.
Use
Children, by using these, get experience of matching the written figure with the number of dots it represents. The value of this particular type of exercise is that if they have a wrong impression it becomes immediately apparent to them.
When to be used
In the recognition of numbers during the second and third term of the first year, and the first half of the second year.
Skittles
(i) Wood sticks or 2″ x 2″ timber. (ii) Saw, chisel, ruler.
Plan
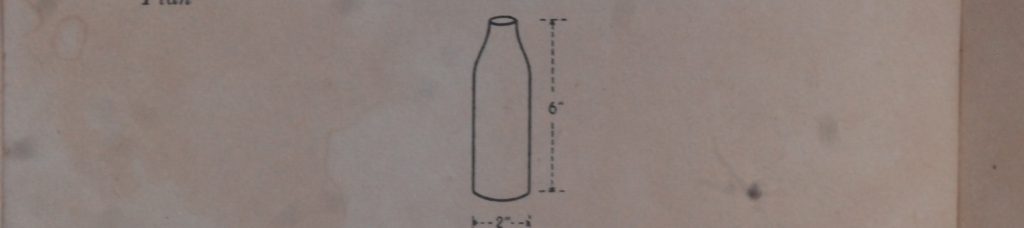
Instructions for making
Straight branches of fairly dry soft wood are most suitable for making skittles. In sawing them, be careful to cut the bottom so that the skittle stands upright. The top of the skittle can be narrowed a little. A coat of paint, or the painting of the skittles to represent people, adds greatly to the attractiveness of the set. Ten skittles make a set and three tennis balls or rubber balls can be used as bowls.
Quantity
One set for a class.
Use
The skittles are set upright and the ball rolled at them. The children count the number of skittles knocked over and the first child to reach the winning number (known before the game) is the winner. The children can work out their score after each round. This can either be done in their books or on the blackboard. The game can be played either as an individual game or a team game.
When to be used
These can be used throughout the first three years; in the first year to count the number knocked down, in the second and third years to add up the numbers and subtract these from the winning numbers so that the children can find out how many more they have to knock down.
THE NUMERALS
(Elementary analysis of number)
Materials required
1 Measuring Strips
(i) Cardboard, white paper from exercise books, ink, paste. (ii) Knife, razor-blade or scissors, pen.
Plan
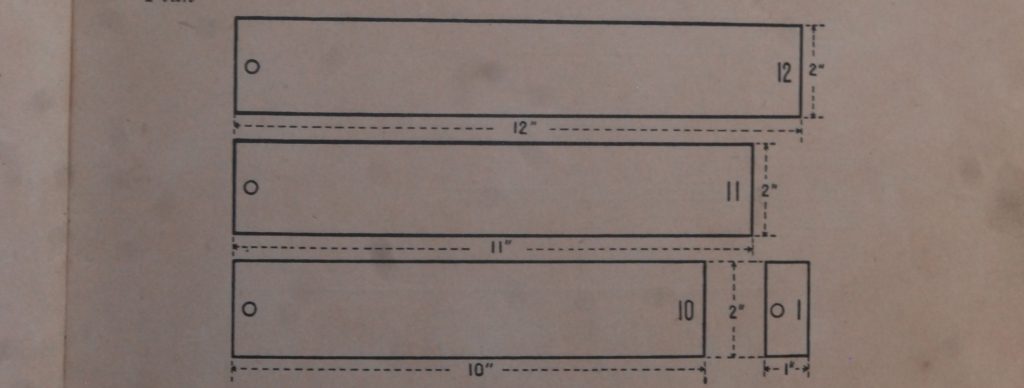
Instructions for making
Cut 2″-wide strips of cardboard in lengths decreasing an inch at a time from 12″ to 1″. Either before or after cutting, paste white paper on both sides. When cut and the paste is dry, write in figures, on both sides of one end, the length of each piece. Make a small hole at the other end and thread the strips together in order so that the smallest is on top and the largest at the bottom.