 Studytipsgh Studytipsgh is to provide effective study strategies and tips to help students get more knowledge to better their Education.
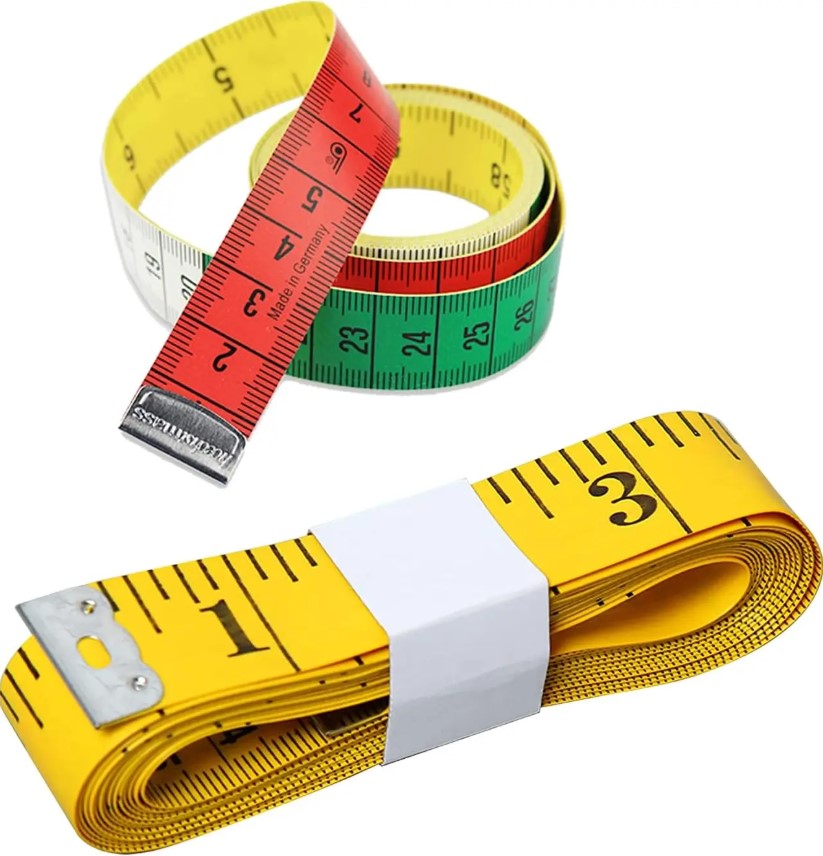
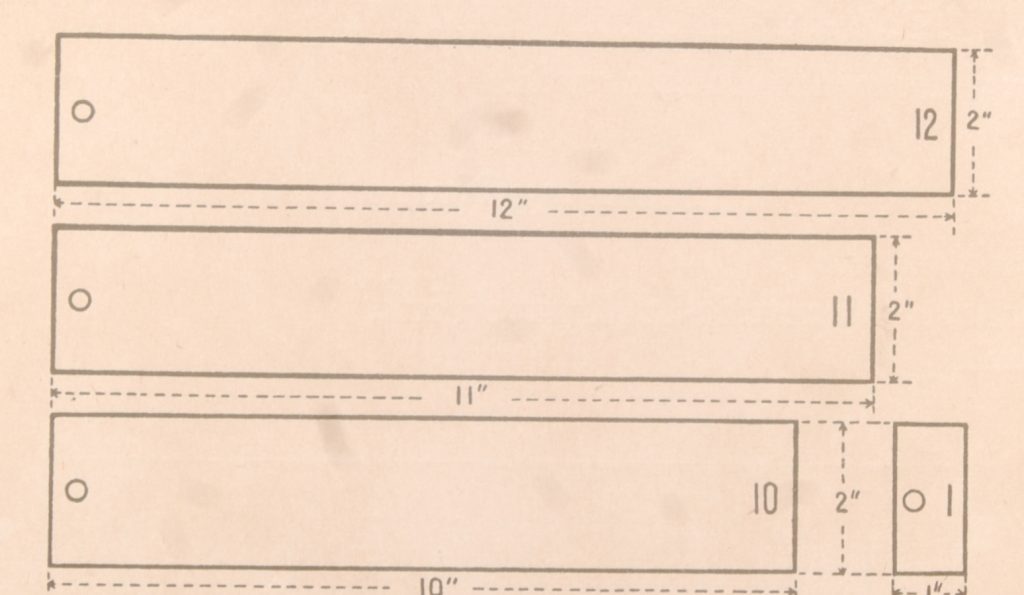
Classroom Equipping – Measuring Strips
Instructions for making – Cut 2″-wide strips of cardboard in lengths decreasing an inch at a time from 12″ to 1″. Either before or after cutting, paste white paper on both sides. When cut and the paste is dry, write in figures, on both sides of one end, the length of each piece. Make a small hole at the other end and thread the strips together in order so that the smallest is on top and the largest at the bottom.
(i) Cardboard, white paper from exercise books, ink, paste.
(ii) Knife, razor-blade or scissors, pen.
Plan
(i) For measuring lengths in inches.
(ii) For analysing numbers, e.g.
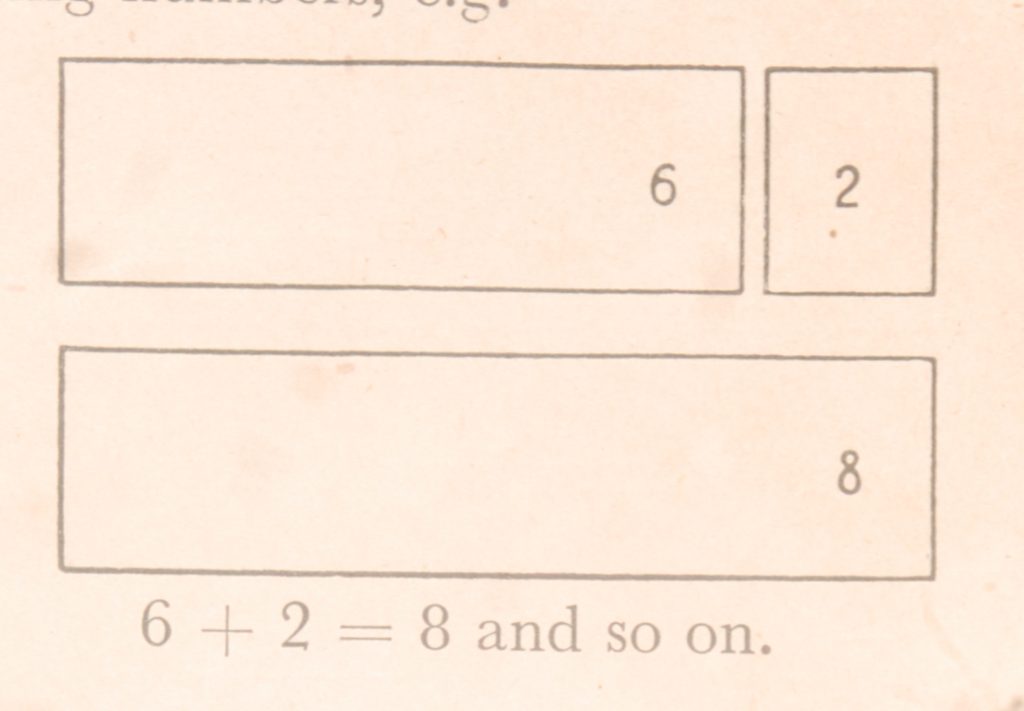
When to be used
6+2 = 8 and so on.
(i) For measuring lengths throughout first and second years. (ii) For analysis of numbers-second and third term of first year and for revision afterwards.
Running Numerals Measuring Strips
3 sheets of exercise-book paper, ink. (ii) Ruler, pen.
Plan
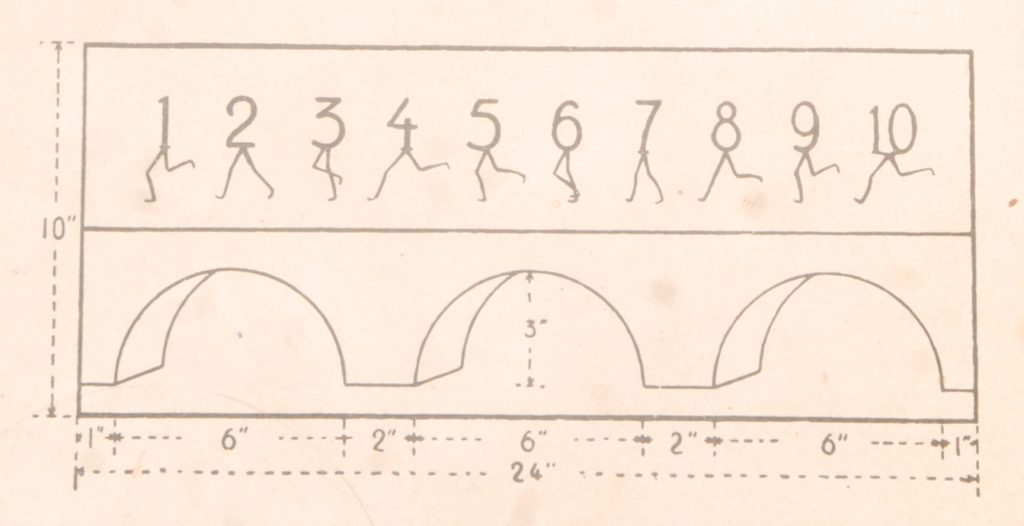
Instructions for making
Paste sheets of paper together to make a strip at least 24″ long. If the sheets are pasted double thickness, the paper will be stronger. Draw in the bridge and the figures.
Quantity
One for each class.
Use
(i) To demonstrate the sequence of numbers-e.g. 5 comes after 4, 6 between 5 and 7, etc.
(ii) To find missing numbers-e.g. cover up one number and ask which one is missing.
(iii) To introduce the meaning of first, second, third, etc.
When to be used
For (i) and (ii) above in the second term of the first year when children are just beginning to use textbooks. For (iii) during the latter half of the second year.
Number Strips
Materials required
(i) Cardboard, paint, or writing paper and paste, ink. (ii) Knife, razor-blade or scissors, pen or paint-brush.
Plan
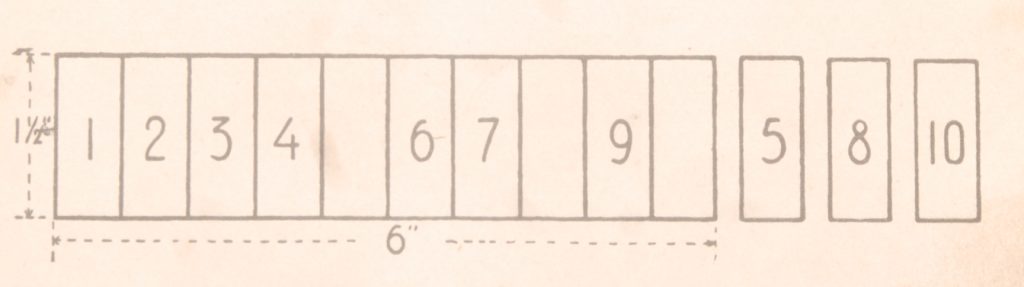
Instructions for making
The cardboard is cut into strips and, if no paint is available, white paper is pasted on. The strip is then divided into either five or ten parts and the figures inked in. Cards with the missing numbers should be cut separately.
Quantity
As many as possible. The number of combinations possible when two or three numbers are missing each time is very large. Use
Children place individual cards in the missing spaces and so gain experience of the sequence of numbers.
When to be used
When children are gaining experience in number sequence- throughout the second and third term of first year. More advanced strips can be made in the second and third year involving numbers up to 100.
Materials required
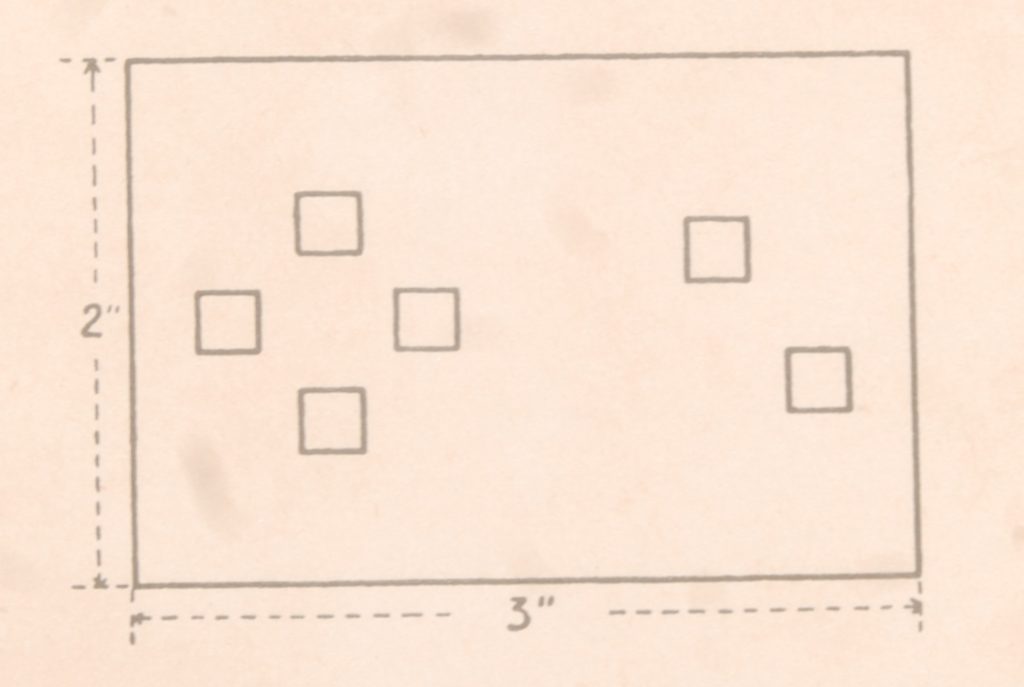
Figure Jigsaw
(i) Cardboard, white paper, ink, paints or old pictures, paste. (ii) Knife, scissors or razor-blade, ruler, pen, paint-brush.
Plan
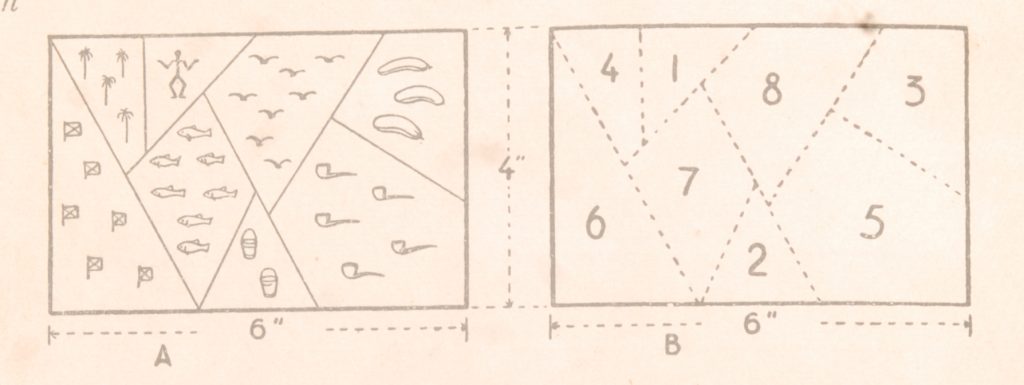
Instructions for making
Two rectangular pieces of cardboard each 6″ x 4″ are cut and white paper pasted over them. The cards are then marked as above. In each space in A a number of objects is drawn ; in B the number is written in the corresponding space. Rect- angle B is then cut along the dotted lines. Use as pictures any objects with which children are familiar.
Quantity Measuring Strips
At least six with different combinations of shapes and figures. Use
The picture card is the master card and the children assemble the cut-out pieces using the pictures as a clue to number recognition. If desired it is also possible to keep the figure card in one piece and cut up the picture card.
When learning to interpret the meaning of figures after intro- ductory work has begun during the early part of the second term of the first year.
Clock Face (First Type)
Materials required
(i) Cardboard, white paper, paste, ink, screw (round-headed), small piece of wood, string, small piece of leather. (ii) Scissors, pen, screwdriver.
Plan
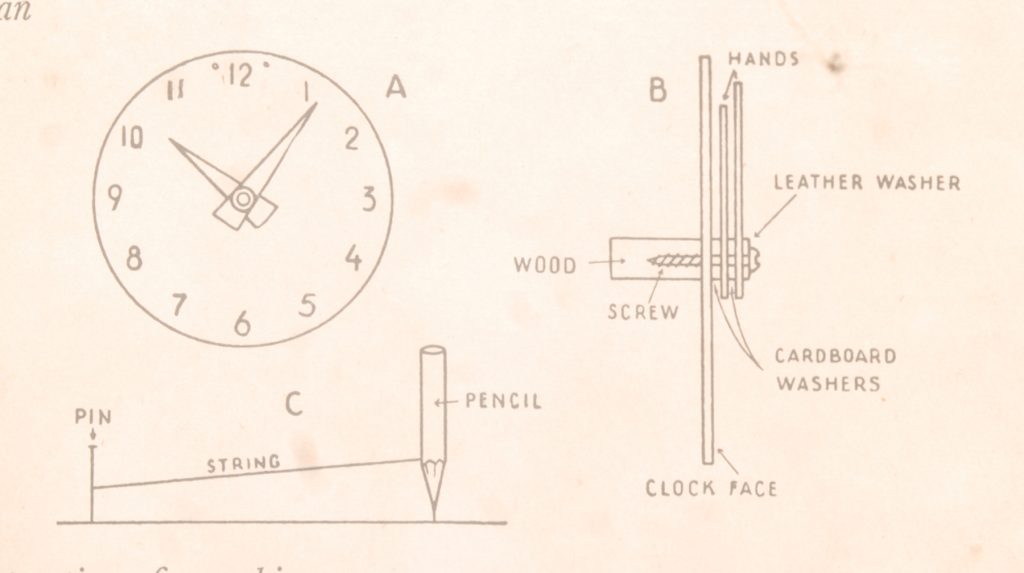
Instructions for making
Using a compass, or pencil and string-as shown in C-draw a circle with a radius of 6″ or 7″ on cardboard, which, if dingy, should have some white paper pasted over it. Write in the numbers. Cut out the hands and if possible colour them to contrast with the white of the clock face. After making the necessary holes push the screw (i) through a cardboard or leather washer, (ii) through the minute hand, (iii) through the second washer, (iv) through the hour hand, (v) through the third washer, (vi) through the clock-face. Screw into a piece of wood on the back (diagram B). If no screw is available, a flat-headed nail will probably suffice. Bore two small holes on the face of the clock as shown in A. Thread string through; this will make a loop with which to hang up the clock.
For teaching children to tell the time to the nearest five minutes. For use in adding, e.g. put hour hand to 3, then add to it whatever number the minute hand is pointing to. Subtraction and multiplication can also be dealt with in this
way.
When to be used
For adding and subtracting towards the end of the first year, and during the second and third years. For multiplication from the beginning of the third year onwards.
Clock Face (Second Type)
Materials required
(i) Cardboard, ink, white paper, paste. (ii) Knife, scissors or razor-blade.
Plan
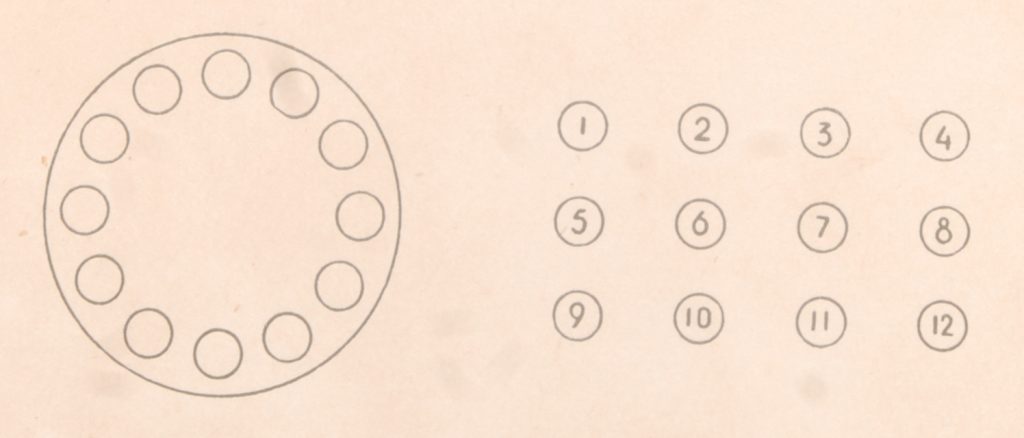
Instructions for making
Cut out a cardboard disc of radius 6″; paste white paper over this. Draw the twelve rings 1″ in diameter on the disc; cut out twelve discs 1″ in diameter; write on each a figure giving the complete range 1-12.
Children place the figures in their correct places as on the clock face.
When to be used
When learning the sequence of numerals-in the second term of first year.
NUMBER GROUPS
I Group Recognition Cards
Materials required
(i) Cardboard, white paper, paste, ink (2 colours) or paint. (ii) Knife, scissors or razor-blade, ruler, pen or paint-brush.
Plan
Instructions for making
Cut out the rectangle the size shown, and if the colour of the cardboard is unsuitable paste on white paper. Paint or draw the squares in groups, each group in a different colour. The total number of squares, circles, etc. should not exceed six on any card.
Quantity
Three sets of all number combinations up to six for a class. Use
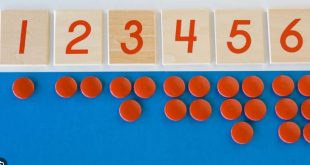
Either for recognizing each group separately and then adding, e.g. 4 squares and 2 squares, or giving the total straight away.